
How to Take Amazing Travel Photos of Yourself
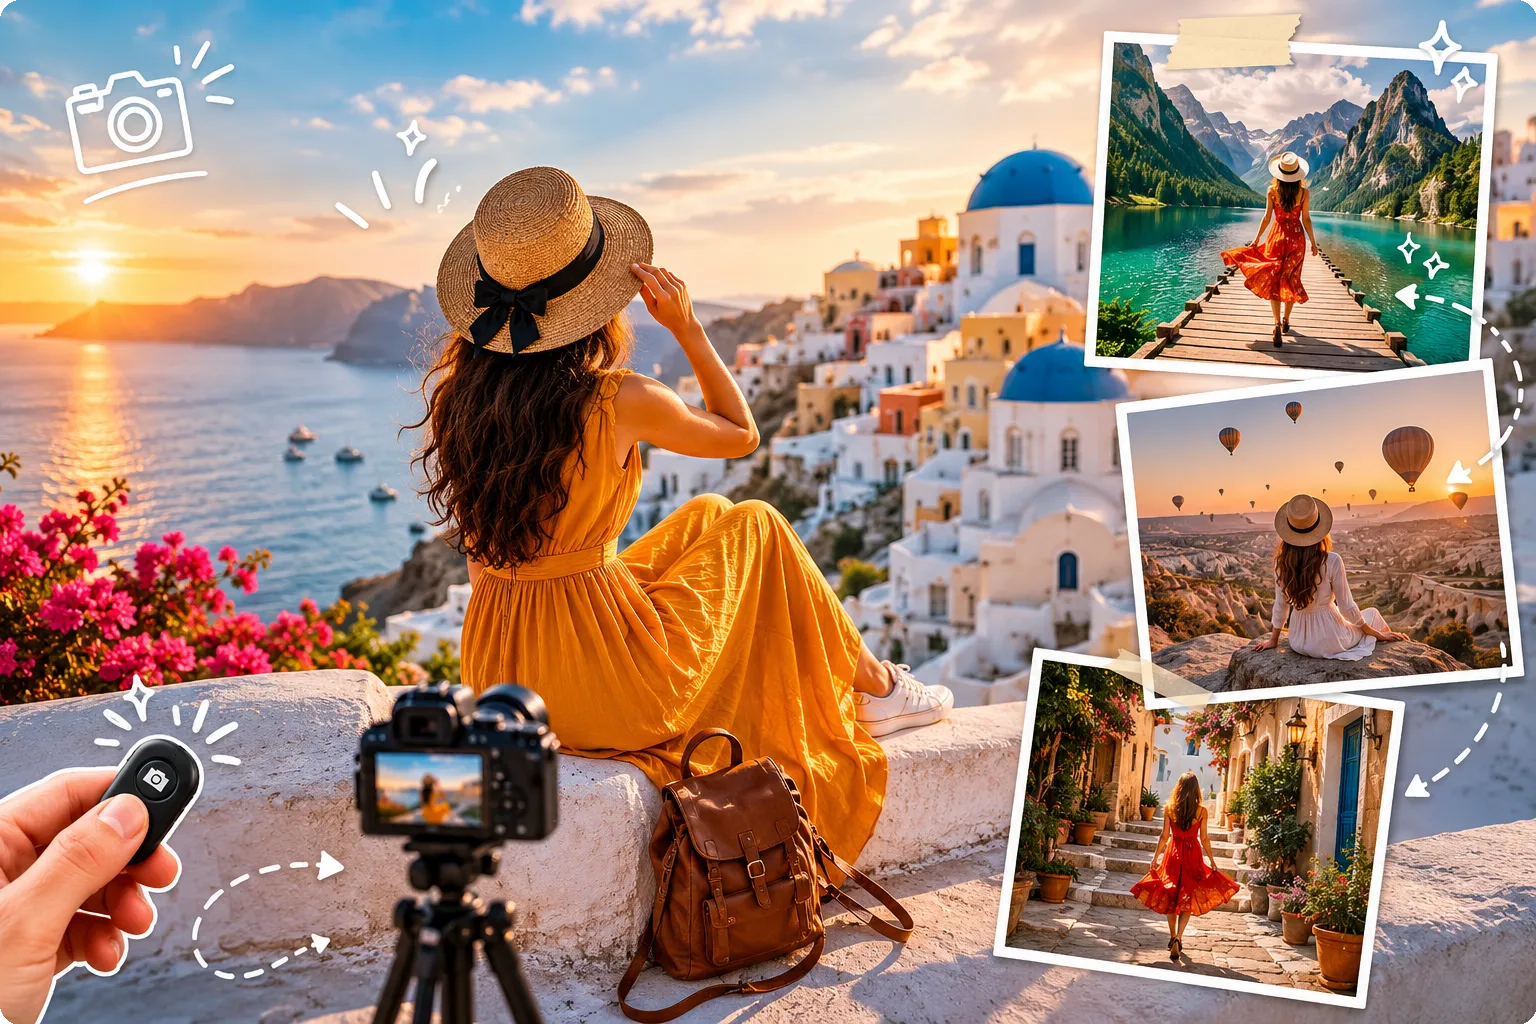
There’s nothing worse than coming home from an incredible trip with zero photos of yourself actually in them. Sound familiar? Whether you’re a solo traveler or just the one who always ends up behind the lens, this guide will show you exactly how to capture stunning travel photos of yourself — ones that look candid, natural, and nothing like the typical arm-stretched selfie.
Here’s everything you need to know.
1. Use a Tripod
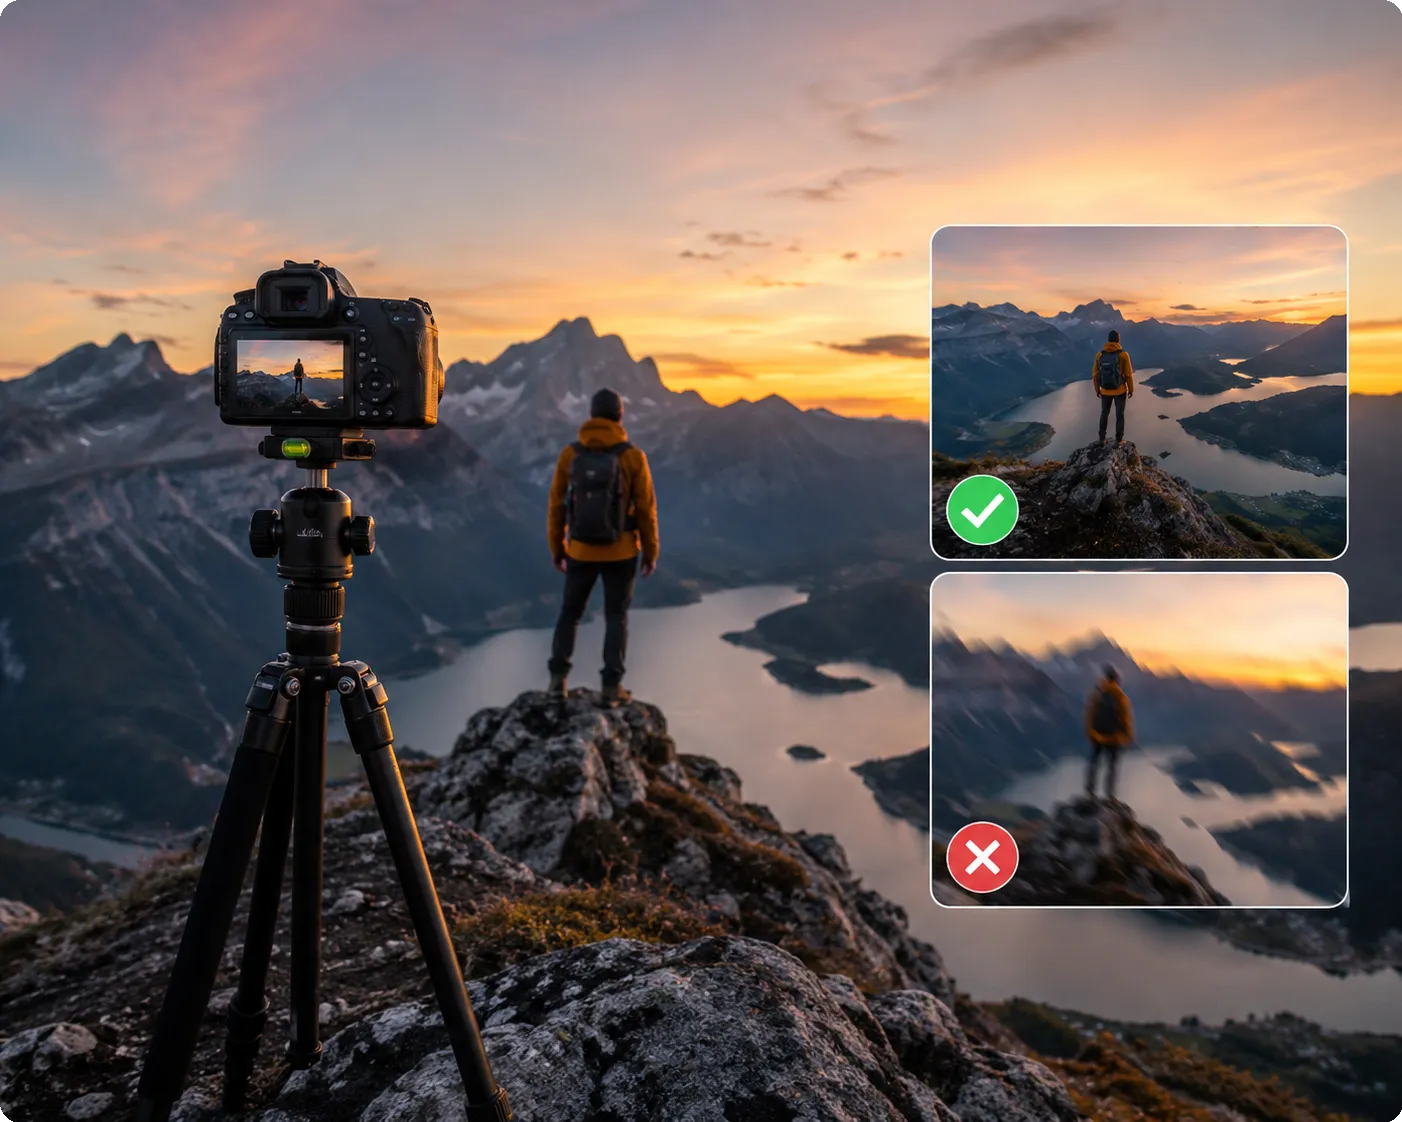
A tripod is the single best investment for solo travel photography. It gives you full control over height, angle, and framing — things you simply can’t achieve by propping your camera on a random rock. It’s also essential for low-light and long-exposure shots where any camera shake will ruin the image.
Yes, tripods can be bulky. But once you get your first perfectly composed shot of yourself in a stunning landscape, you’ll never leave home without one.
2. Set a Timer and Run Into Frame
This is the classic move — and for good reason. Set your camera up, frame the shot exactly how you want it, hit the 10-second timer, and get into position. Most modern cameras pair with a smartphone app that lets you see a live preview, so you can check your framing and expression before the shutter fires.
Pro tip: If you don’t want your phone visible in the shot, trigger the timer, set the phone down, and walk into frame naturally.
3. Shoot Long Exposure at Night
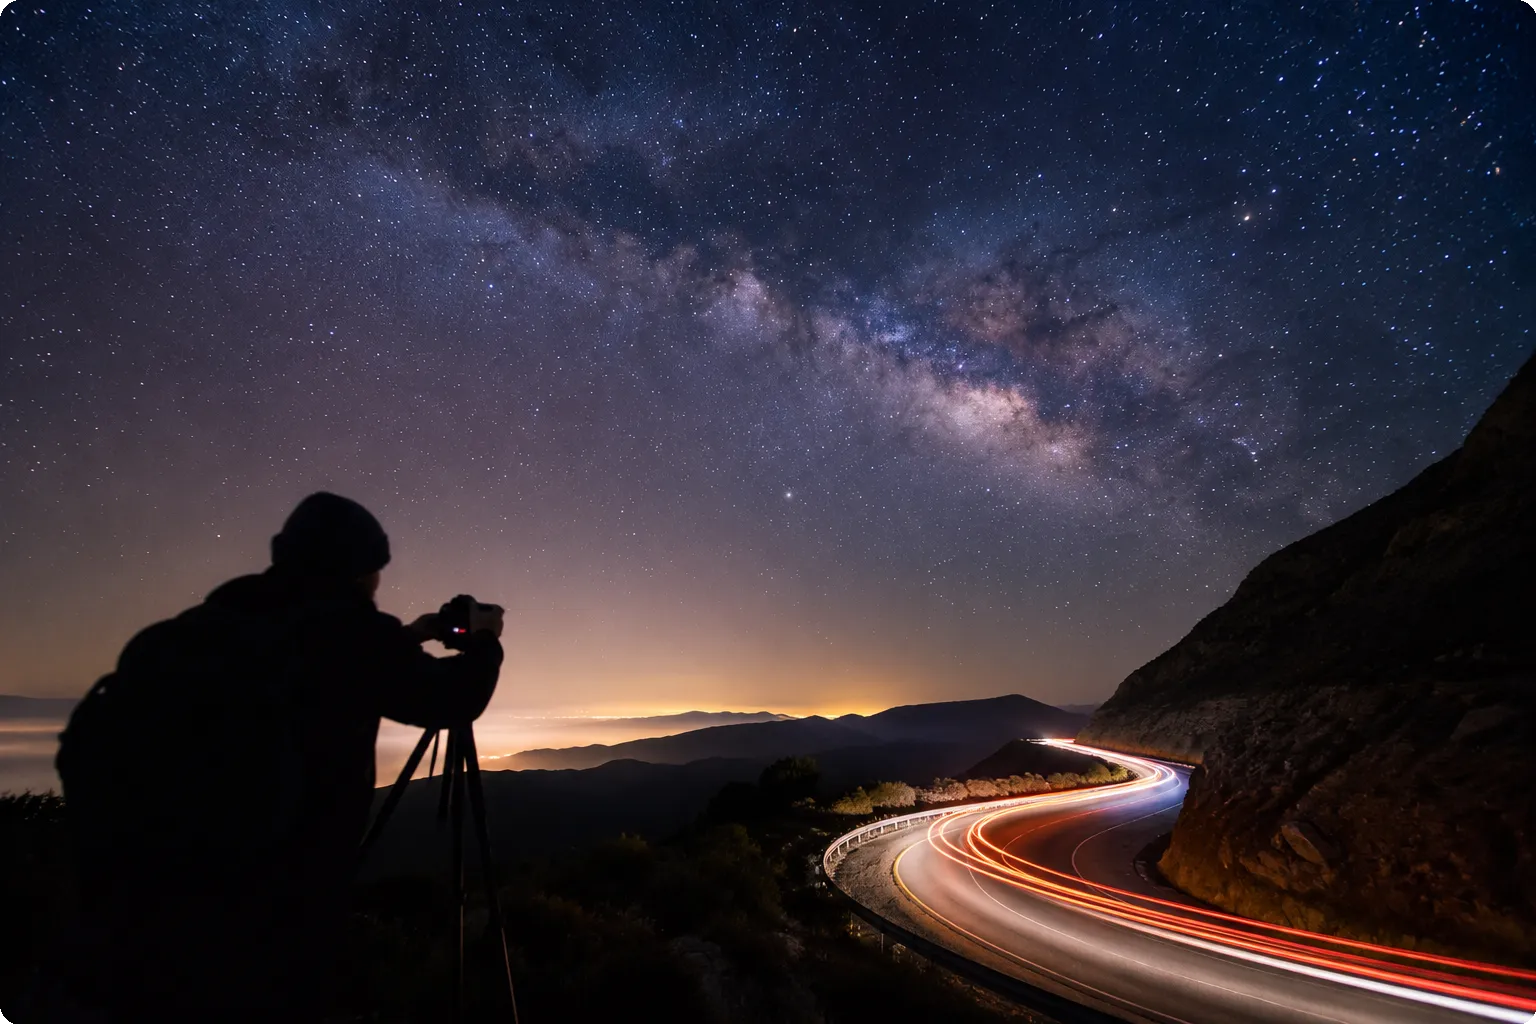
Want a dramatic shot under a starry sky? You’ll need a tripod, a slow shutter speed, and a remote shutter release to avoid any camera shake. The result? Silhouettes against the Milky Way or light trails that make your travel photos look genuinely cinematic.
4. Use Time-Lapse Mode to Try Multiple Poses
Set your camera or intervalometer to shoot one frame every second or two, then move freely in front of it. You’ll end up with dozens of frames to choose from — candid, natural-looking shots that capture real movement rather than a stiff posed moment.
This is especially useful when you want to appear small in the frame and need to be far from the camera, since phone-to-camera Wi-Fi range has its limits.
5. Fly a Drone for Aerial Selfies
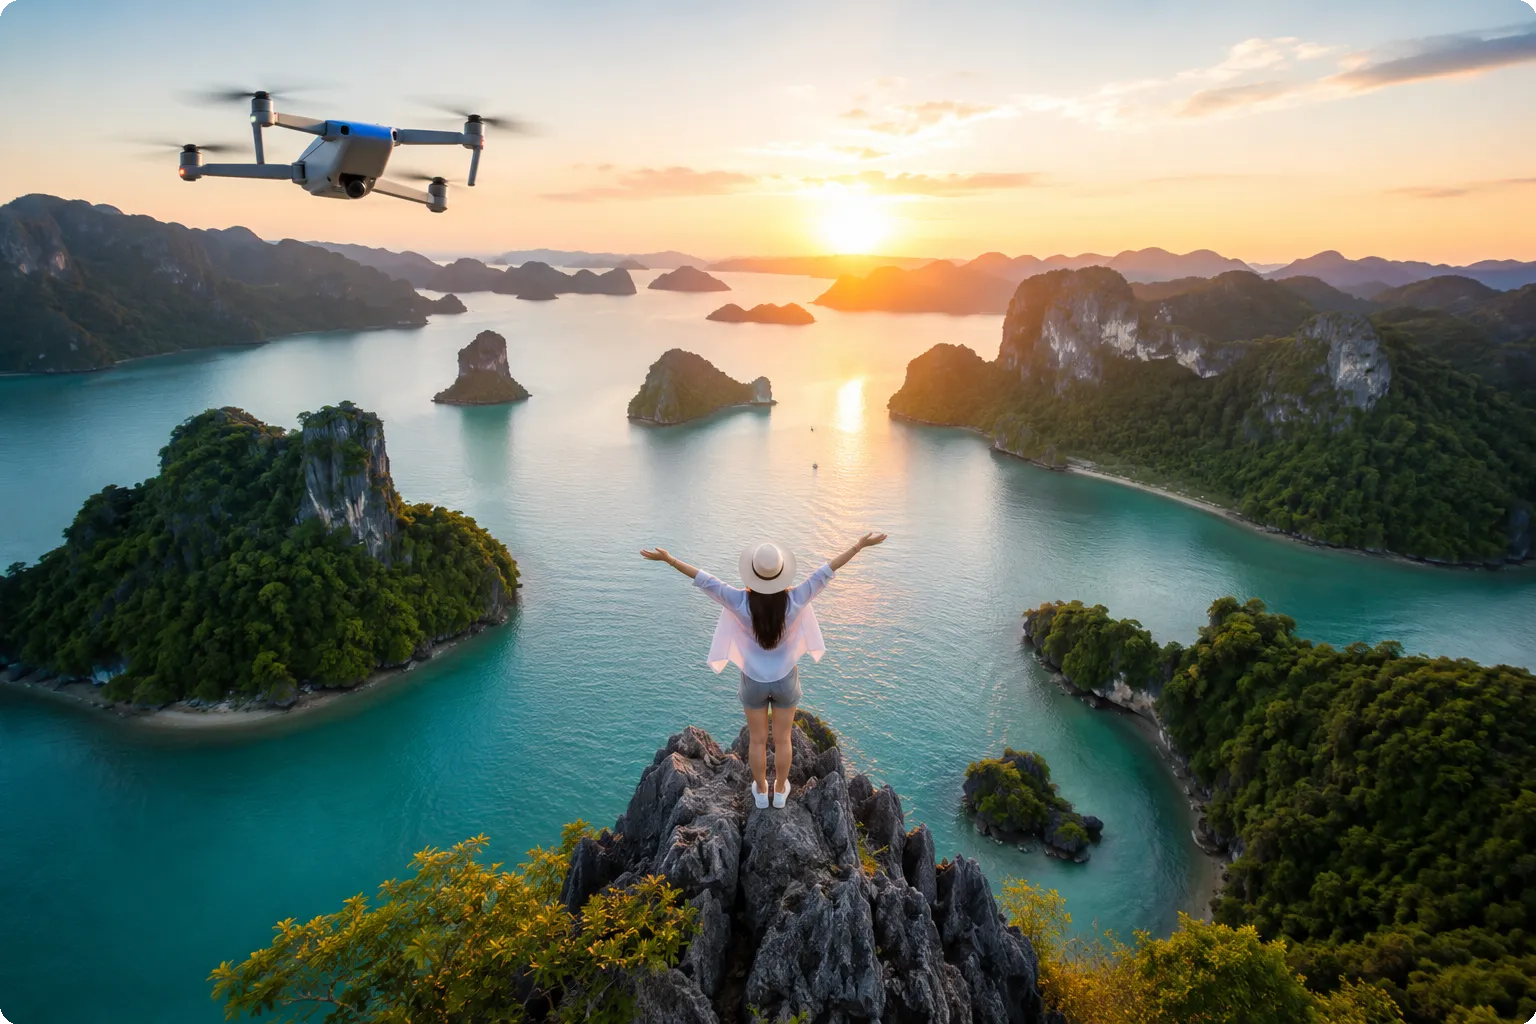
No tripod? No problem. A drone lets you capture aerial perspectives — whether you’re a tiny dot in a sweeping landscape or the focal point of a striking bird’s-eye shot. It’s one of the most creative ways to photograph yourself in a destination.
Just make sure to check local drone regulations before you fly. Many national parks, urban areas, and restricted zones prohibit drone use.
6. Set Up the Shot, Then Hand Off the Camera
Sometimes the easiest solution is asking a fellow traveler to press the shutter — but do it strategically:
- Ask someone who’s already carrying a camera. They’re more likely to understand composition and far less likely to bolt with your gear.
- Frame the shot yourself first. Tell them exactly where to stand, what to keep in frame, and what you’re going to do. Take the creative direction out of their hands.
- Don’t settle for the first attempt. If it doesn’t look right, politely wait for that person to move on and try again with someone else.
7. Balance Your Camera on Whatever’s Nearby
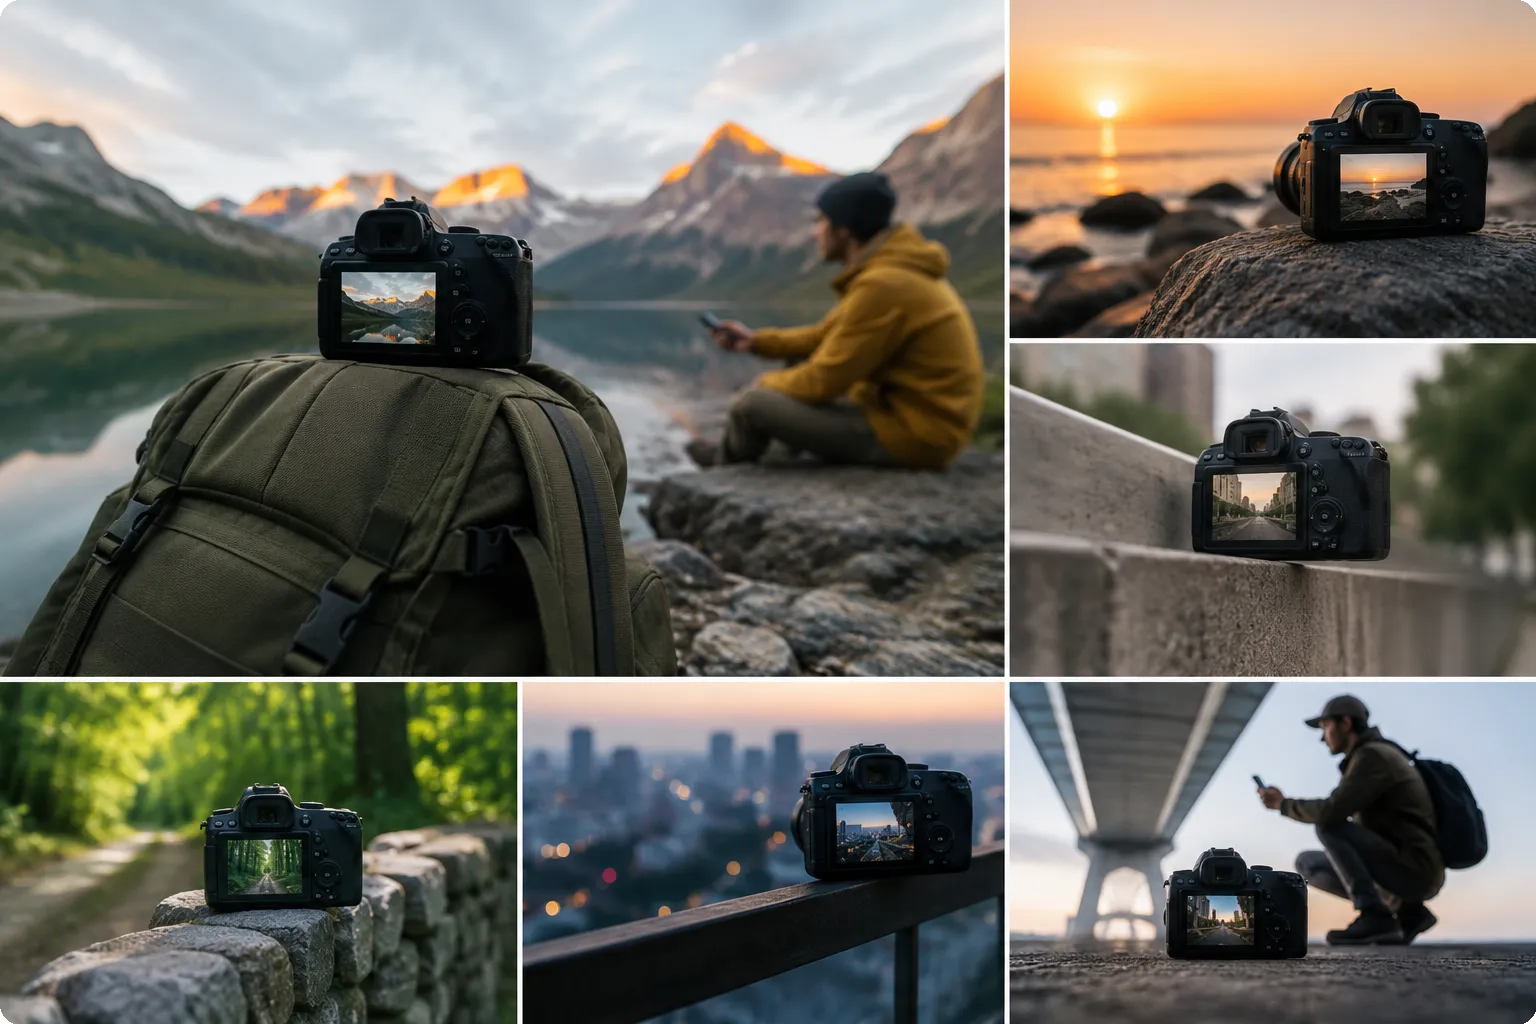
No tripod on hand? Look around. A backpack, a flat rock, a ledge, a wall — almost anything can work as a makeshift camera stand. Just make sure it’s stable before you step away.
This method takes more trial and error, but it often leads to unexpectedly creative angles you wouldn’t have thought to try with a tripod.
8. Place the Camera on the Ground
Shooting from ground level gives you a dramatically different perspective. Try placing your camera on the ground, propping the lens up slightly with a small object to angle it toward you. The result is a low, dynamic point of view that instantly makes a photo feel more editorial and interesting.
9. Use a Wide-Angle Lens to Work Closer to the Camera
A wide-angle lens is one of the best-kept secrets in solo travel photography. It lets you get a lot into the frame without having to be hundreds of feet away from your camera. You can appear small in a big landscape while staying close enough to use a remote or timer effectively.
10. Use a Telephoto Lens to Make Background Elements Pop
Sometimes the thing behind you — a mountain, a castle, a skyline — looks tiny and insignificant without the right lens. A telephoto lens compresses distance, making background elements appear larger and more dramatic relative to you in the foreground.
It’s also a beautiful portrait lens, producing that creamy background blur that makes subjects stand out.
Final Thoughts
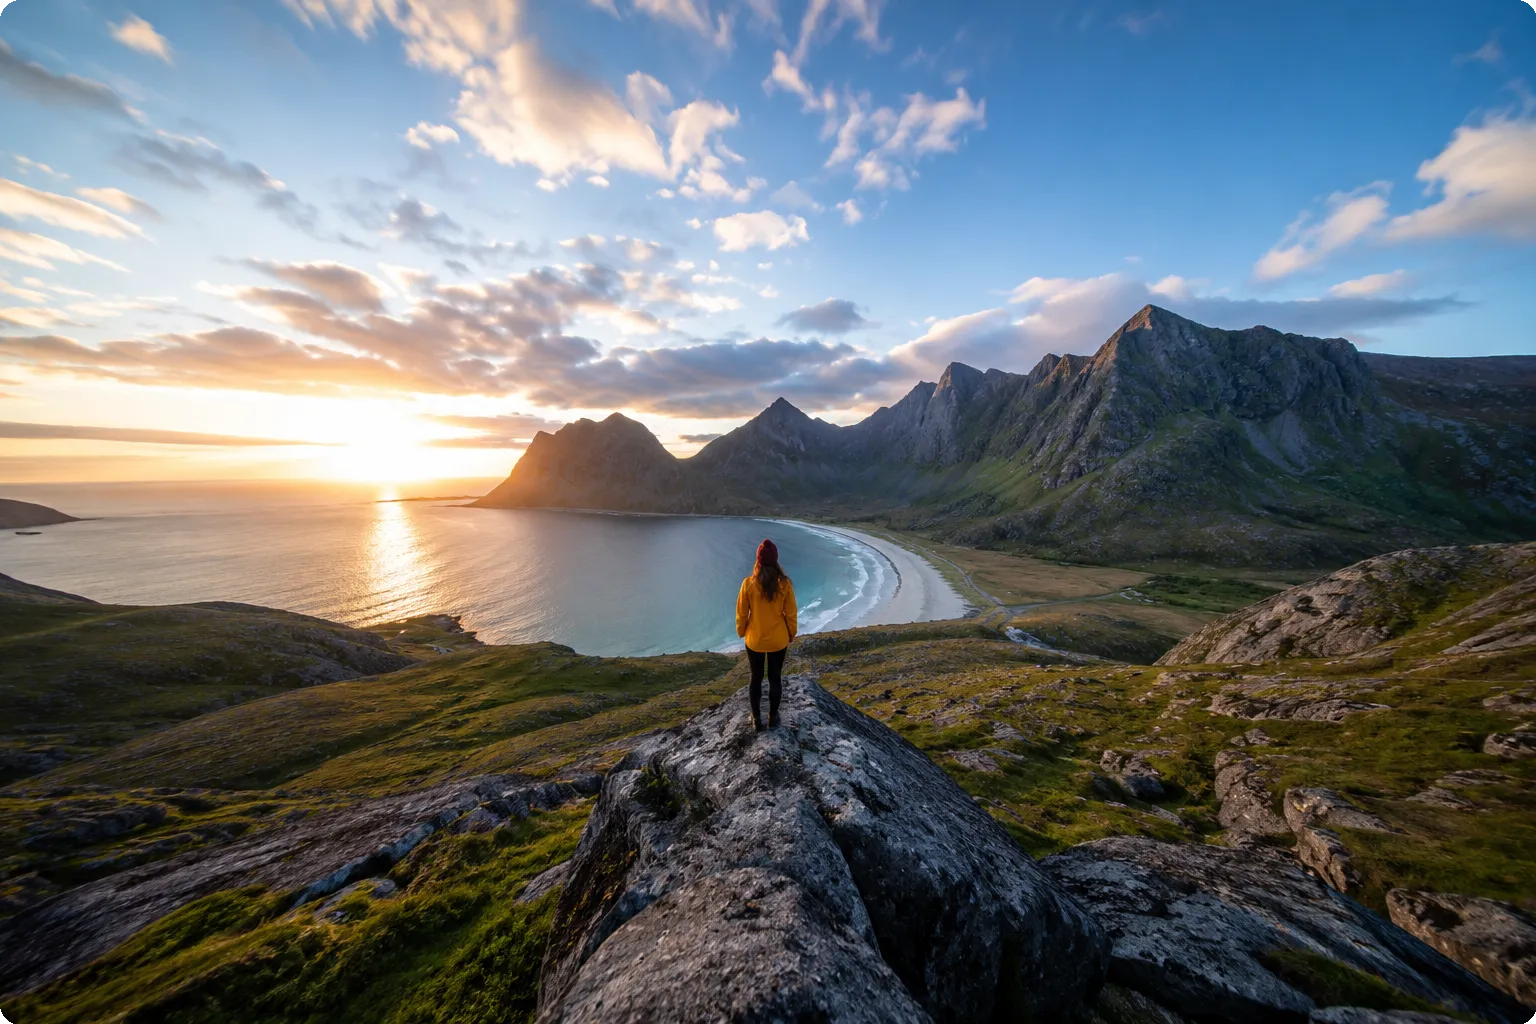
Taking great travel photos of yourself isn’t about vanity — it’s about being present in your own story. Years from now, you’ll be glad you figured this out. Whether you go full gear-head with a drone and wide-angle lens or keep it simple with a timer and a stable rock, the goal is the same: come home with photos that actually show you were there.
Now get out there and get in the shot.